
But there's a catch. Results swing wildly based on PSI, nozzle choice, siding material, and technique. Get it wrong, and you're looking at cracked stucco, gouged wood, or water forced behind your siding.
This guide walks through the full process: step-by-step instructions, when DIY makes sense versus calling a pro, the equipment you'll need, key settings, and how to troubleshoot common mistakes.
Key Takeaways
- Match PSI to siding: vinyl/brick 2,500–3,000; wood, stucco, and paint 1,000–1,500 or soft wash
- Spring and fall offer the best washing conditions
- Work top to bottom in one direction; keep the nozzle a few feet off the surface
- DIY saves money but carries real risk of injury and siding damage
- Never pressure wash from a ladder, and always test pressure on a small area first
How to Pressure Wash a House: Step-by-Step
Step 1: Prepare the Area and Yourself
Before you touch the trigger, protect what's around you.
- Cover landscaping, outdoor furniture, light fixtures, and outlets with tarps or plastic sheeting
- Close and seal windows and doors; tape leaky seams to block water intrusion
- Wear closed-toe shoes, safety goggles, gloves, and clothes you don't mind soaking
- Inspect siding for cracks, loose boards, or gaps and patch minor issues first
Step 2: Choose the Right Pressure Washer and Nozzle
Your siding material dictates your pressure setting. According to Home Depot's house-washing guide, vinyl siding tolerates 2,500-3,000 PSI, while aluminum, stucco, and soft-grain wood need closer to 1,200-1,500 PSI.

- Gas vs. electric: Gas units deliver more power; electric units are lighter and quieter—rent if this is a one-time job
- Wide-angle nozzles (25- to 40-degree): Best for siding and other delicate surfaces
- Narrower nozzles: Better for tough stains on concrete or brick
Most household exterior jobs stay at or under 3,000 PSI.
Step 3: Mix and Apply Cleaning Solution
Pre-treatment does the heavy lifting so you don't have to rely on pressure alone.
- Switch to a soap-compatible nozzle and mix house-wash detergent or mildewcide per the label
- Apply from the bottom up to avoid streaking
- Let it sit for the recommended dwell time—don't let it dry in direct sun
This step loosens grime before you rinse, meaning you can use less pressure and reduce your risk of surface damage.
Step 4: Rinse the Exterior Safely
Now for the rinse itself.
- Start near the gutters and overhangs, working downward in overlapping side-to-side passes
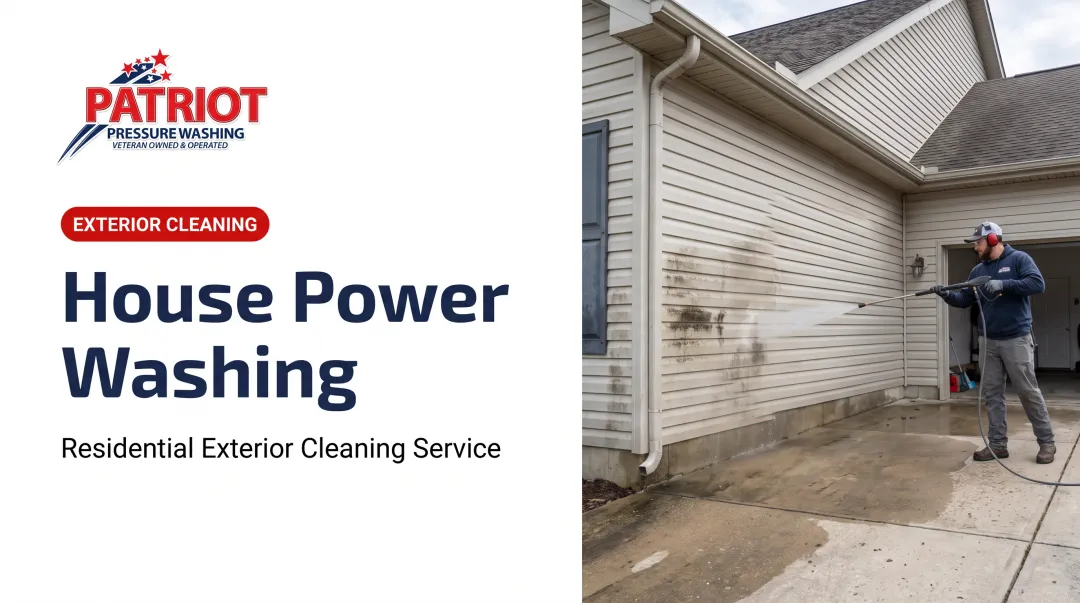
- Keep the wand 3-6 feet from the surface, angled at roughly 45 degrees
- Never point the washer into cracks, vents, electrical fixtures, or at people, pets, or windows
- Finish with a walk-around to catch missed spots, streaks, or newly revealed damage

When Should You Pressure Wash Your House?
Most homes benefit from a wash once a year, or sooner when you see green algae, dark mildew streaks, or grime that won’t rinse off with a hose. Spring and early fall are common windows in many U.S. climates—after pollen drops or before winter wet weather sets in. It’s also smart to wash before painting, staining, or listing a home so coatings and curb appeal start clean.
DIY still isn’t the right call for every job.
Good DIY candidates:
- Single-story vinyl, brick, or stone with light dirt, algae, or mildew
- Annual maintenance on sound siding with no peeling paint
- Small, easy-to-reach walls you can clean from the ground
- Surfaces you’ve already tested in an inconspicuous spot
Hire a pro when you face:
- Multi-story walls that need extension wands or ladders
- Older, soft, or fragile siding
- Suspected lead paint
- Cracks, rot, or other existing damage
If your project lands in that riskier group, Patriot Pressure Washing’s team in Hartford, CT matches pressure, equipment, and method to each material. On delicate siding and painted surfaces, they use soft washing instead of high PSI, then finish with a full inspection and customer walkthrough.

What You Need Before Pressure Washing Your House
Proper prep and the right supplies directly affect both safety and your final results.
Equipment You'll Need
- Pressure washer (gas or electric)
- Extension wand for multi-story homes
- Garden hose
- Assorted nozzle tips
Materials and Supplies
- House-wash detergent or mildewcide
- Tarps or plastic sheeting
- Duct tape
- Soft-bristle brush for stubborn spots
Safety Readiness
- Safety glasses and waterproof gloves
- Closed-toe, non-slip shoes
- Hearing protection for gas units
Before you start, locate outdoor outlets and fixtures, and confirm your siding’s PSI tolerance. Most DIY damage comes from skipping these checks.
Key Factors That Affect Your Results
A handful of adjustable variables separate a clean, even finish from a patchy or damaged one.
PSI Setting
Too much pressure strips paint, cracks stucco, or drives water behind siding. Matching PSI to the material lifts dirt effectively without collateral damage.
Nozzle Angle and Distance
A nozzle held too close or straight-on can gouge wood or force water into seams. A 45-degree angle held at the proper distance cleans without opening a path for moisture.
Weather and Timing
Hot sun dries the cleaning solution too fast, leaving streaks and residue behind. Mild spring or fall days with even cloud cover produce the most consistent results.
Cleaning Solution Dwell Time
Rinse too soon or too late, and you lose effectiveness against mold and algae. Following the product's dwell-time instructions maximizes stain removal while needing less pressure.

Common Mistakes and Troubleshooting
Most DIY pressure washing damage traces back to a handful of repeat offenders:
- Using a ladder while operating the wand, risking falls from kickback force
- Choosing too high a PSI for wood, stucco, or painted surfaces, causing chipping or gouging
- Spraying directly into siding gaps, vents, or electrical fixtures, risking water intrusion or shock
When the wash is done and something still looks off, these fixes usually solve it.
Problem: Streaks remain after rinsing
Likely cause: solution dried before rinsing, or uneven overlap between passes.
Fix: Reapply to a small area and rinse promptly with slow, overlapping strokes.
Problem: Water appears behind siding after washing
Likely cause: nozzle held too close or angled straight into seams.
Fix: Inspect for gaps, increase your distance, and switch to a 45-degree spray angle.
DIY vs. Hiring a Professional Pressure Washing Service
DIY offers control and a lower upfront cost. Professional service reduces risk and typically delivers a more consistent result.
Here's the math many homeowners miss: rental equipment plus detergent, tarps, and your own time can approach professional pricing once you factor in the risk of damaging your siding.
Patriot Pressure Washing, a Disabled Veteran Owned Business serving Hartford, Cromwell, Glastonbury, and surrounding Connecticut towns, brings a few specific advantages:
- Upfront estimates based on property size, surfaces, and buildup level — no hidden fees
- Clear scheduling with no lengthy delays once a quote is accepted
- 100% satisfaction guarantee so every job is scoped upfront and finished to an agreed standard
- Military discipline on every job, drawn from founder Eric's 19 years of service
For homeowners who'd rather skip the ladder risk on a multi-story home or aren't sure their siding can handle DIY pressure, that's the trade-off worth considering.
Frequently Asked Questions
How much does it cost to power wash a house?
Professional pressure washing typically runs $0.10 to $0.50 per square foot, or roughly $213 to $448 per job nationally, according to HomeAdvisor's cost data. Your final price depends on home size and condition.
How much does it cost to pressure wash house siding?
Siding jobs usually fall in the same $0.10–$0.50 per square foot range, with material, stories, and grime level driving the final price. Vinyl and brick cost less than fragile stucco or wood that needs soft washing.
How long does it take to power wash a 2,000 sq ft house?
Expect roughly 2 to 4 hours for a single-story home. Multi-story homes take longer due to extension wands, ladders, and extra care around windows and rooflines.
Is power washing the same as pressure washing?
Both use pressurized water, but power washers heat the water while pressure washers use it at ambient temperature. Hot water cuts grease and oil faster; cold water handles general dirt and grime well.
What is soft washing?
Soft washing combines low pressure with a specialized cleaning solution, making it ideal for delicate surfaces like roofs and painted siding. It removes algae, mold, and stains without the abrasive force of high-PSI washing.
When should you not power wash your house?
Skip DIY pressure washing if you suspect lead paint, have fragile or cracked stucco, or need to reach a multi-story exterior without proper equipment. These situations call for a professional assessment first.